Getting Started with MediaScribe
Overview
This article covers getting a new MediaScribe setup and ready for the first meeting. MediaScribe Gateway Appliance ship preconfigured from the factory. When they arrive they need to be physically setup, connected to the internet, and that's it. In this article we will cover.
Gateway Appliance Setup
Networking Setup
MediaScribe Basic Operation
Demo Mode
Gateway Appliance Setup
After receiving the MediaScribe Gateway appliance take it out of the box and attach the optional rack ears if required for rack mounting. In order to complete setup a keyboard, mouse, monitor, and internet are required. The connections are described below.
Physical Connections
Port / Connector | Description |
|---|---|
VGA | Used to see the appliance's operating system desktop for network configuration. |
USB Keyboard / Mouse | Used to operate the desktop operating system to configure networking. |
Ethernet | Required to connect to Local Area Network and Internet. |
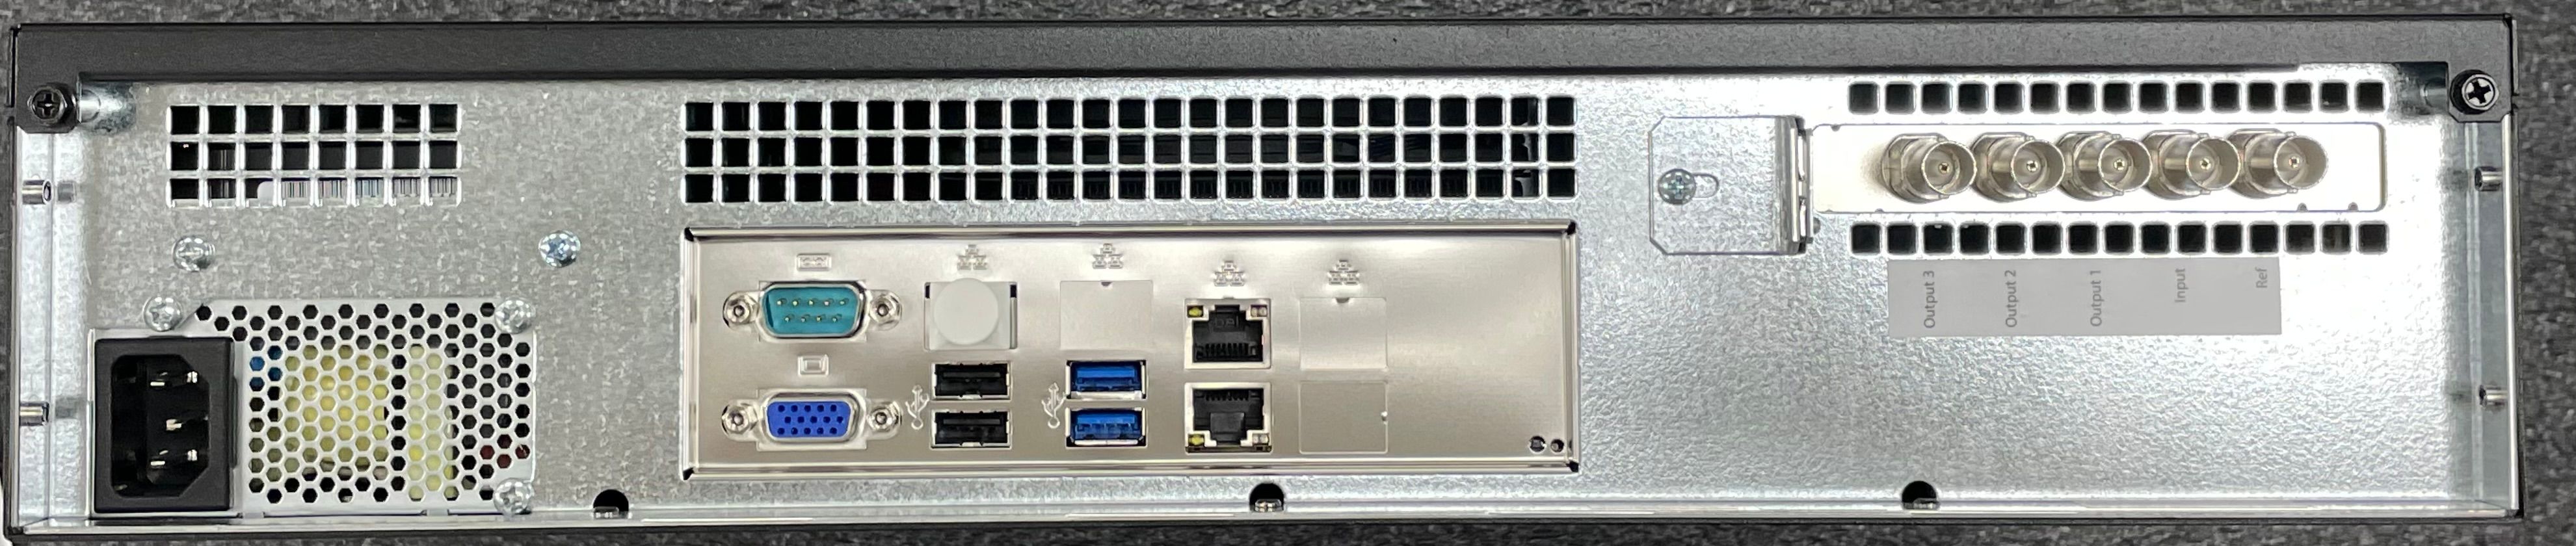
SDI Label | Description |
|---|---|
Ref | Reference Input for genlock of outputs. Not required. When left unconnected the outputs will syncronize to internal clock. |
Input | Source Input. Should be connect to production switcher, camera feed, etc. Supported resolutions are: 1080i5994 1080p5994 1080p60 720p5994 NTSC |
Output 1 Output 2 Output 3 | Outputs can be configured to output: Closed Captions Open Captions In-Room Transcript Display |
Powering On
Once the MediaScribe appliance is physically wired, power the unit on. It will go through a short OOBE (Out of Box Experience) routine where you must accept some licensing conditions and allow the operating system to check for updates. This process usually only takes a few minutes.
Username and Password
MediaScribe appliances ship with a unique username and password combination for each customer. The username and password are recorded on the welcome card that comes in the box as well as the back lip of the MediaScribe Gateway appliance.
Use the username and password to login to the appliance to configure the network in the next section.

Networking Setup
To operate MediaScribe you will need the IP address of the unit. This section will describe how to find the current IP address and how to change the IP address if needed.
Reserved or Static IP Addresses Are Recommended
It is recommended to use a static IP address or a reserved DHCP address for your MediaScribe appliance. This avoids the IP address changing between events.
Click the Start button (Windows icon) or press Windows key.
Select Settings (or type Settings and hit Enter).
Navigate to Network & Internet.
Click Ethernet.
Note the IPv4 address in the properties section.
To change the IP address click Edit to right of IP assignment.

Accessing the MediaScribe UI Outside of the Local Network
If you want to be able to access the MediaScribe UI from outside of the local network, you'll need to configure an external IP that points to your MediaScribe system.
Basic MediaScribe Operation
To access the MediaScribe UI, you can enter the IP address of the MediaScribe server into any browser on a workstation that's on the same network as the MediaScribe unit. If you have an external IP/DNS address configured for MediaScribe, you can enter that into a browser from any workstation within or outside of the local network.
MediaScribe is designed to be extremely simple to operate. To start an event, toggle transcribe in the header. This will begin transcription and recording of the event.
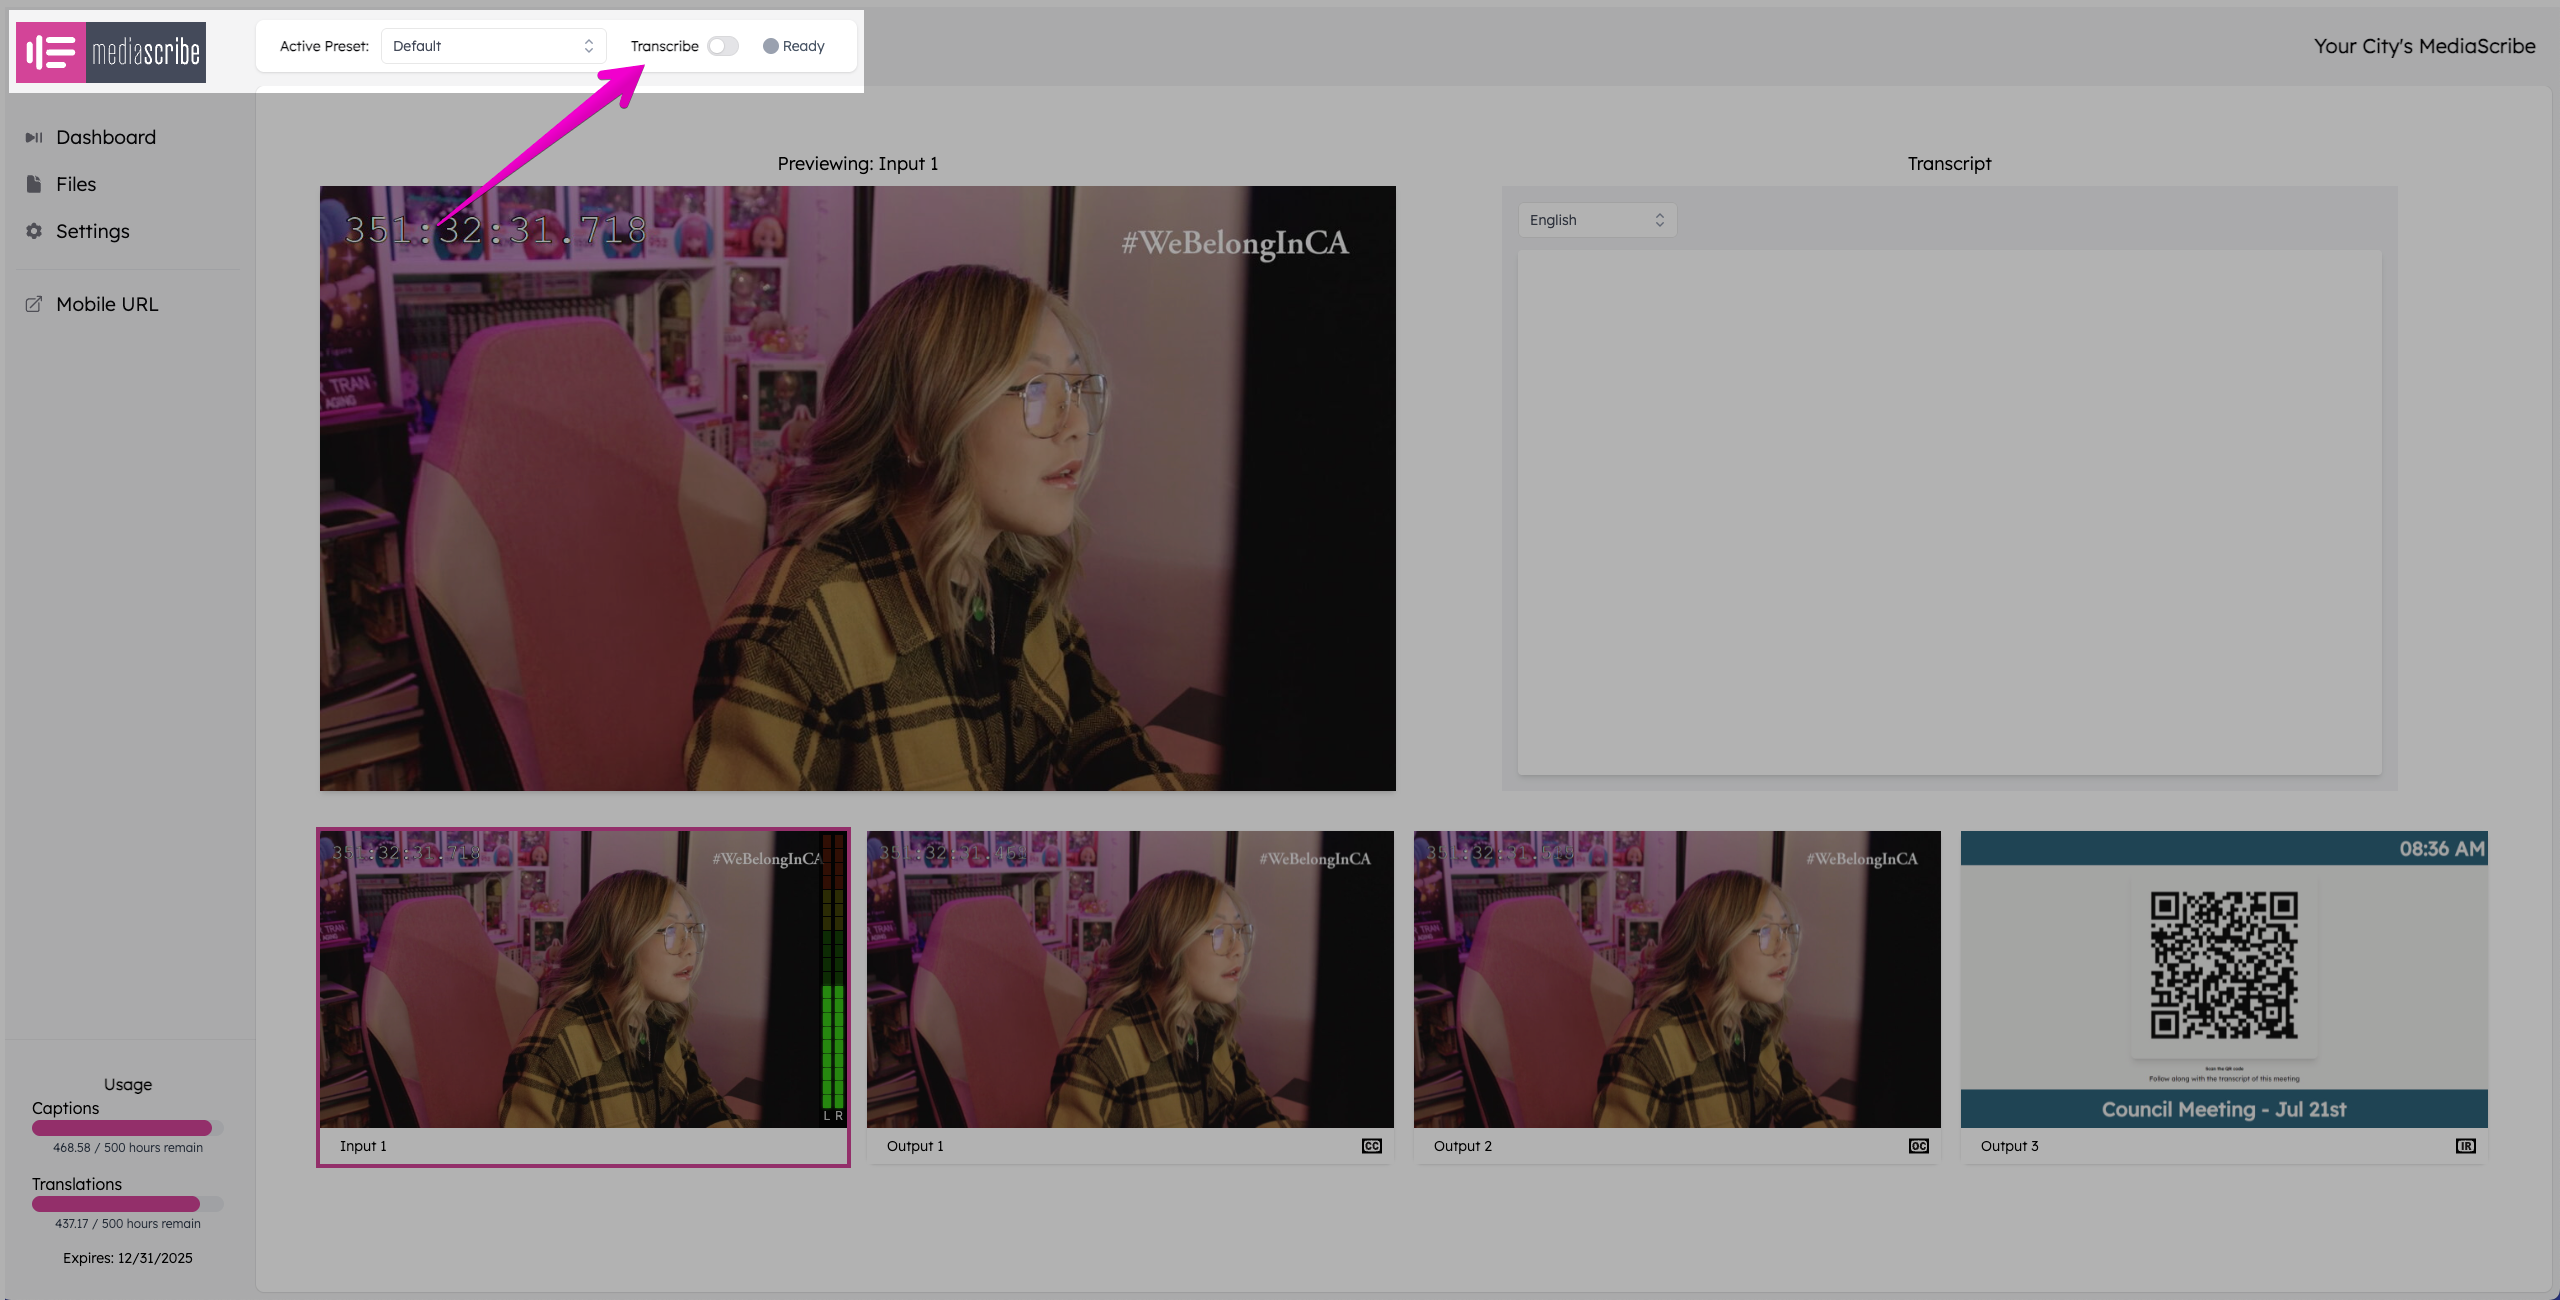
When the event is over simple toggle transcribing off to stop.
Further Reading
Configure Languages, Translations, and Outputs with Presets.
For Simple Operation use the Clerk Interface.